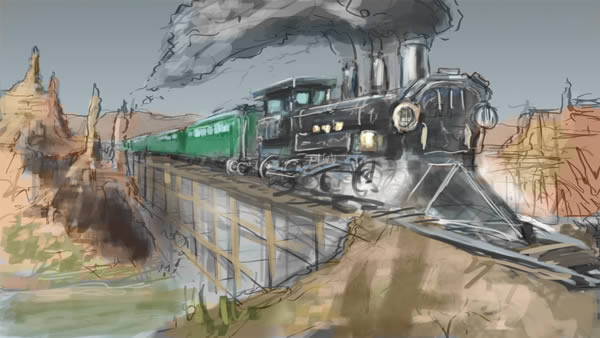
When mixing photos, it’s often helpful to use digital painting techniques to help improve your scene. In this tutorial, we will show you how to combine several photos to create a realistic scene of a locomotive passing through a desert landscape. This tutorial will begin as a sketch, we will then show you how to combine photo manipulation and digital painting techniques to create finished artwork that looks amazingly close to the original sketch. Let’s get started!
Tutorial Assets
The following assets were used during the production of this tutorial.
- Rust
- Sky
- Train-01
- Train-02
- Train-03
- Additional Photos (included in download)
- Brushes (included in download)
Preparation
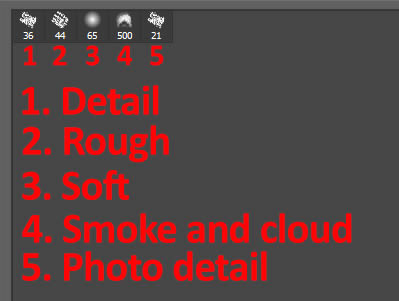
You can get the brushes I used in this tutorial in the download file that accompanies this tutorial. The first one is to paint details on a sketch. The second one is to draw roughly, and has its Opacity set to Pen pressure. The third one is simply a soft brush. The 4th is the one I use for fog, smoke, steam and clouds. And the last one is used to add some details inside a photo.
Step 1: Basic sketching
I had in mind to create a design with an "old west" theme. So, let’s start sketching some ideas!
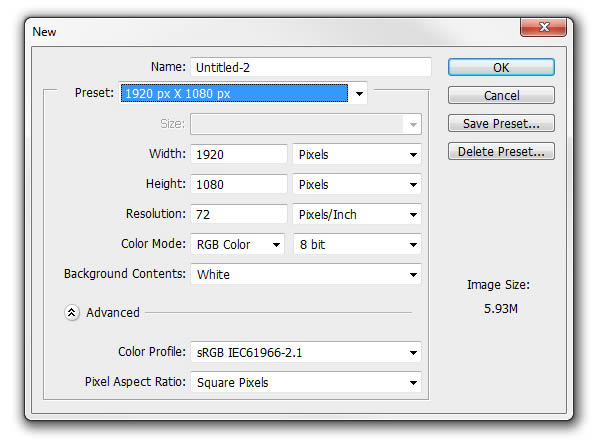
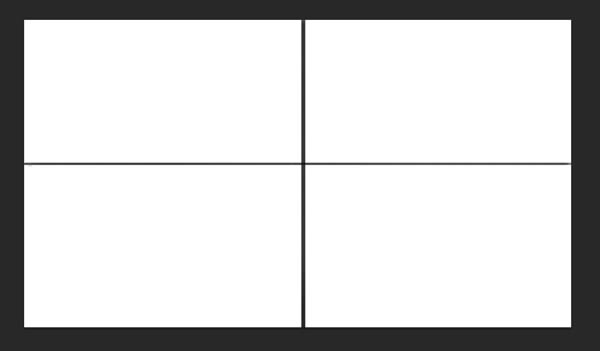
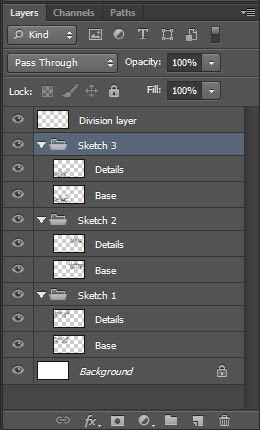
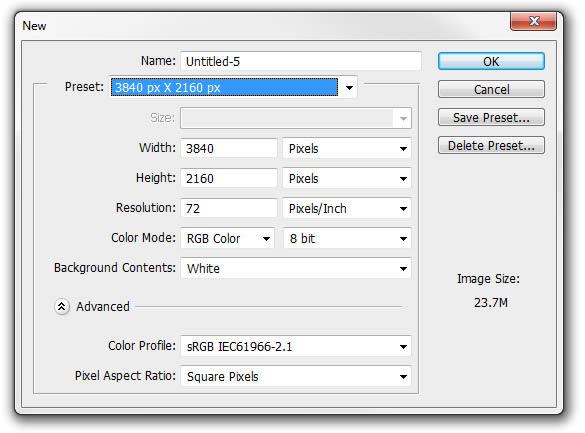
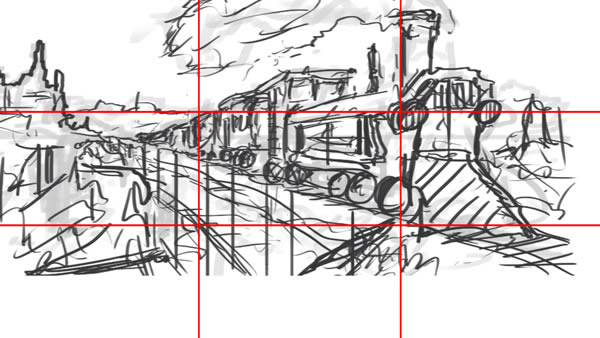
Use the same settings as shown below and create a new file. Then, divide the canvas into 4 small pictures on a new layer, simply with a brush constrained horizontally and vertically by having Shift pressed while drawing the lines. That layer will always be at the top of the list.
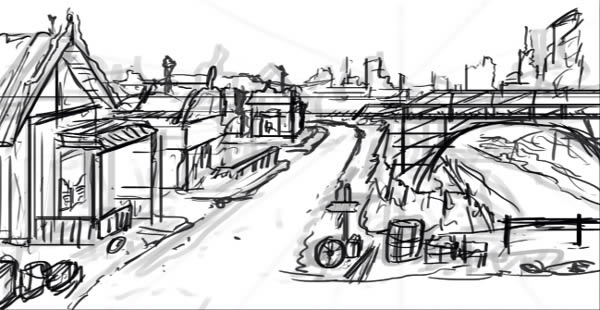
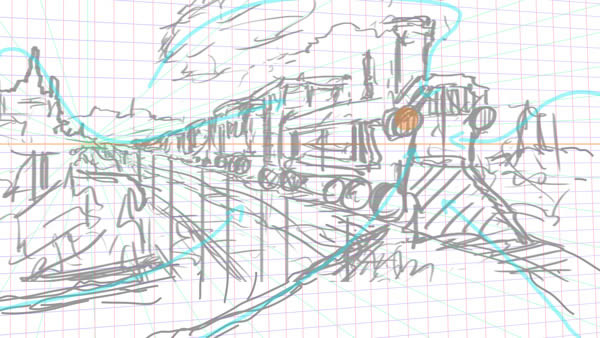
By using brush #2, start to sketch on a new layer called "Base", very quickly. Start with the horizon line and some vanishing lines. The key is to be fast, and to focus on the composition. The details will come way later!
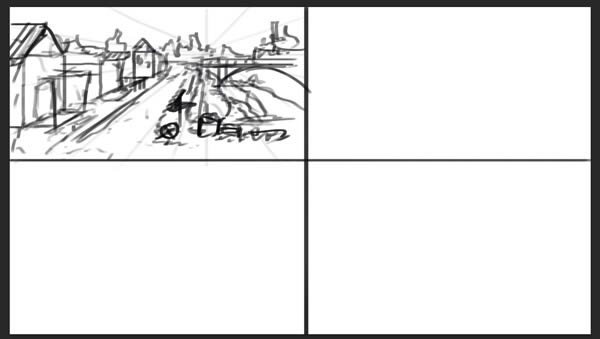
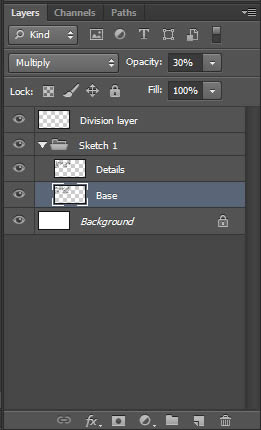
Change the “Base” layer’s opacity to about 30%, create a new layer called “Details” and refine the lines with a more precise brush, the #1 one.
And here we are, the first sketch is already done!
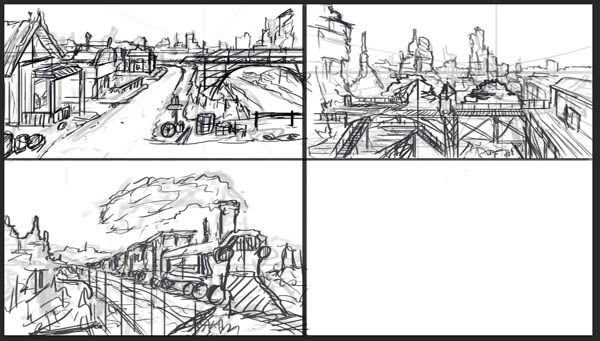
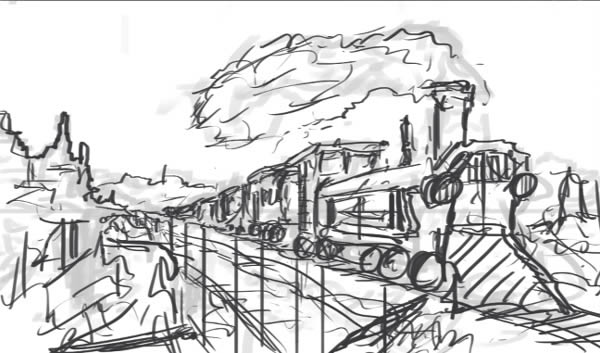
I did the same process for 2 other sketches. And I obviously chose the one with the train!
[tip]
Tip: Always try to have your layers well grouped and organized!
[/tip]
Step 2: Create some helpful layers
Now that we decided which sketch we’ll use to makes our photo realistic landscape, it’s better to put some shapes and values. But we’ll do it later. In this step, we’ll set the basic sketch, and add some special layers that will help you during the whole tutorial. Create a new file with following settings.
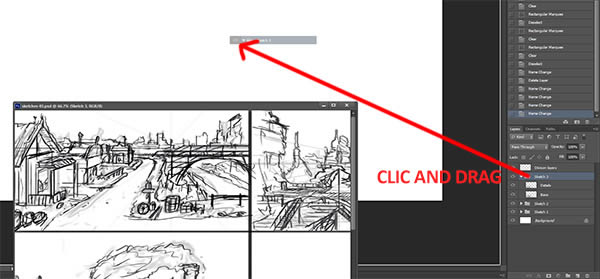
Drag the group of the sketch you chose in the new canvas.
Create a new layer called "Thirds rule" and draw 4 lines in a red color which separate the drawing into 9 equals parts.
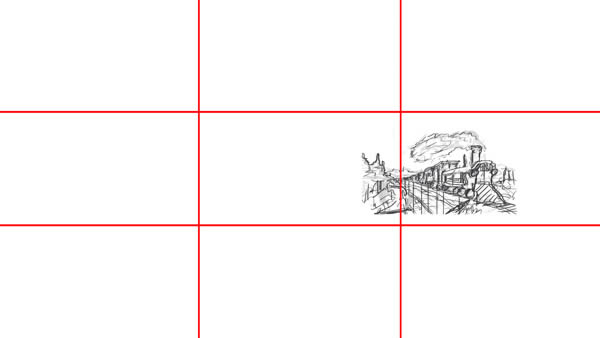
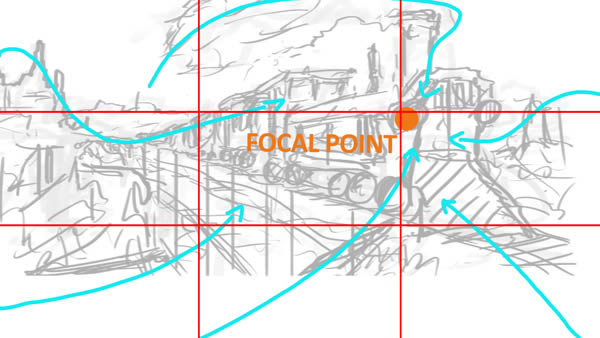
Select the group of the base sketch we just dragged, press Command/Ctrl + T to transform it and place it. Think about the composition. We need the focal point to be over one of the 4 points of the thirds rule. In my case, I decided to put the right light of the locomotive, which can have some heavy contrasts to attract more the eye of the watcher.
Set the Opacity of the sketch group to 40%. Then, create a new layer called "Composition", and try to give the direction of the drawing in order to get the control of it! We draw on this layer a focal point, and the direction lines we want on this composition such as below.
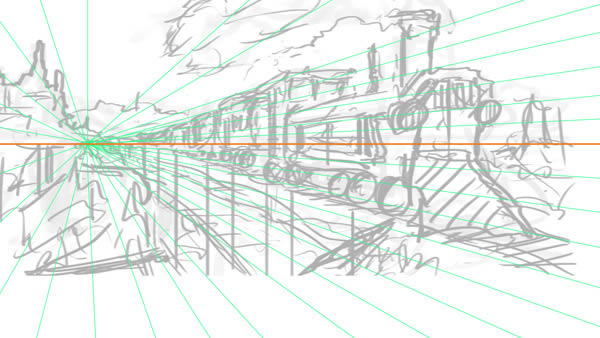
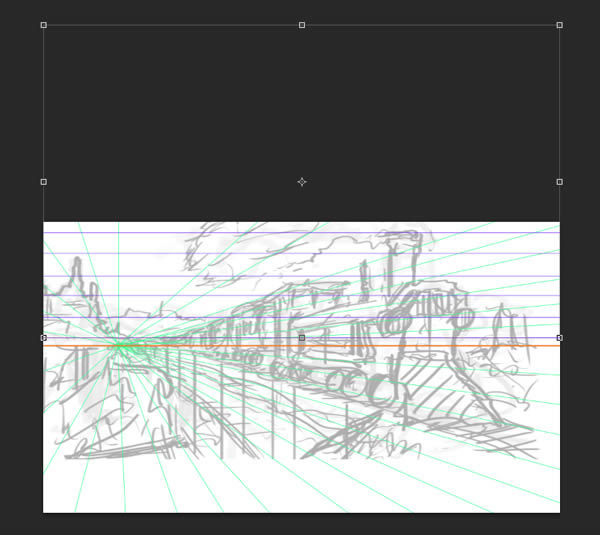
Now it’s time to set the perspective. As this is a photo realistic design, we want to have a 3 point perspective. Let’s create a new group (Command/Ctrl + G) called "Persp". First we create a new layer, "Horizon line". We take the Line tool (U), set the Weight to 10 px and we draw the Horizon line in a very saturated color, orange in my case, by having Shift pressed to constrain. Then create a new layer called "Point 1", and draw smaller lines (4 px) from that first point with a different saturated color.
The second point is a little tricky because it is far away. We create a new "Point 2" layer, and draw horizontal lines on all over the drawing. Then put it above the Horizon line with the Move Tool (V).
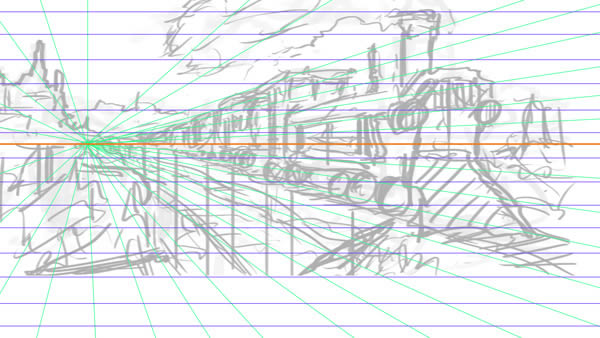
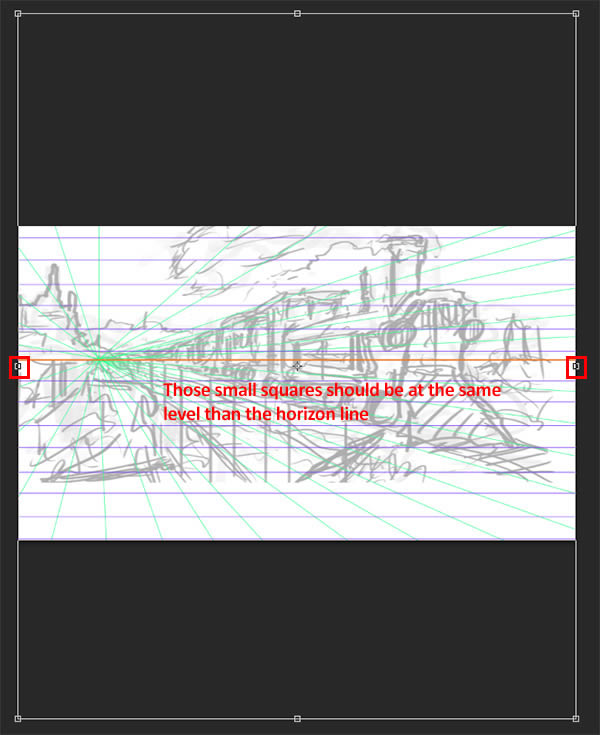
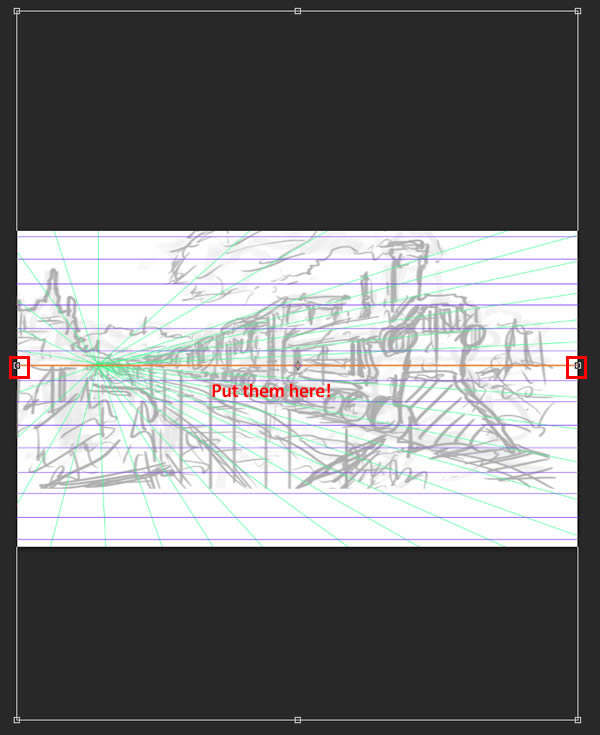
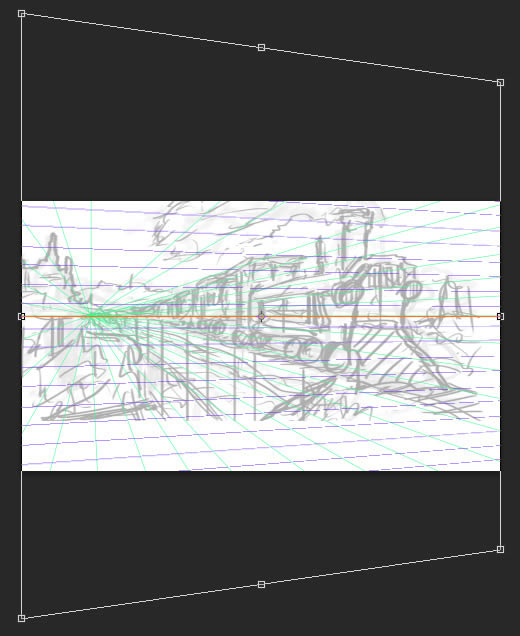
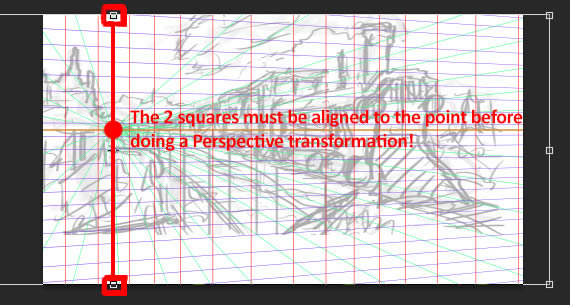
Then we duplicate this layer with Command/Ctrl + J, and put the new one below. Merge those 2 layers by selecting the one above and by pressing Command/Ctrl + E (Merge Down). Press Command/Ctrl + T to transform the layer. The trick is to place the center of this layer at the same level as the horizontal line. Use those 2 small squares, which are at the middle of the selection. Refer to below.
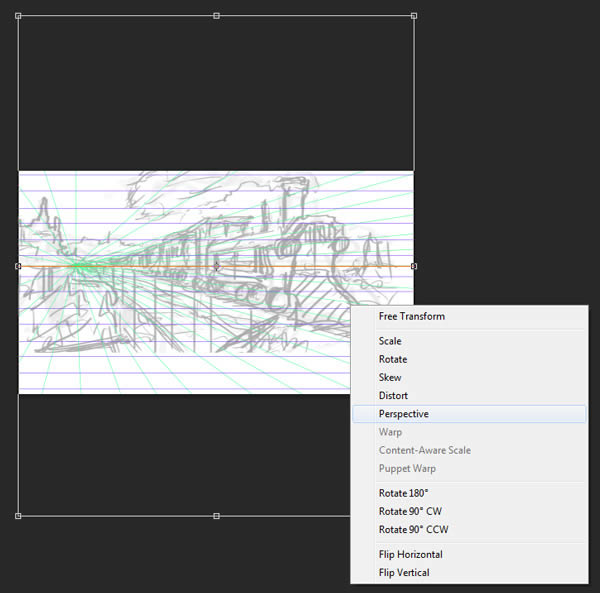
When the middle of the lines is placed on the horizon line, we can Right Click, choose Perspective and from the corner, drag the mouse in order to get this.
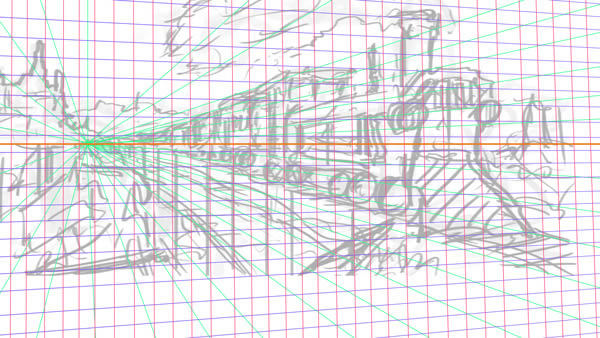
Do the same with the vertical lines on a new “Point 3″ layer. Keep in mind that this third point is really far away. Therefore, your Perspective Transform must be really small.
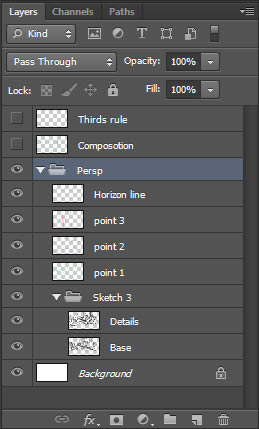
The canvas and the layers must keep well organized and look like below.
Now close the "Persp" group and set the opacity to about 40%. Do the same for the Composition layer. You can click on the eye whenever you need to, in order to keep a very correct perspective! You can always come back on the "Composition" layer as well, to be sure you keep going in the right direction. Keep the "Thirds rule" layer. You can use it if you want to add a second small focus point for example. Save your work! (always!)
Step 3: Black and white sketching
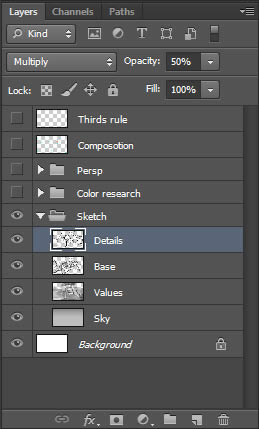
Now that the “technical stuff” is done, we can focus on the values and shapes. Now rename the “Sketch 3″ group to “Sketch”. Delete the “Base” layer. Rename the “Details” layer to “Base”. Create a new layer called “Details”. Set the mode of the layers “Base” and “Details” to Multiply.
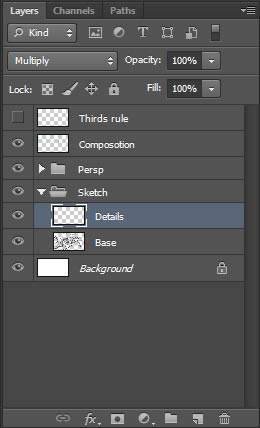
Now draw some more precise details on the new "Details" layer in order to get something like this.
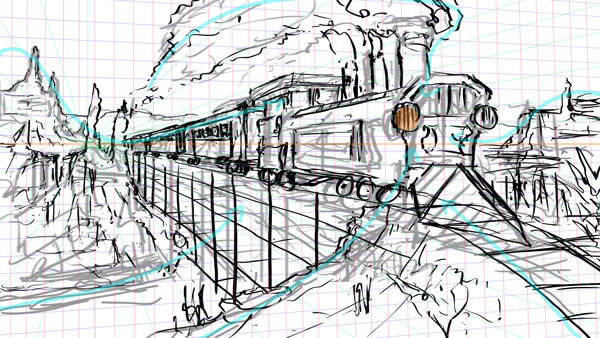
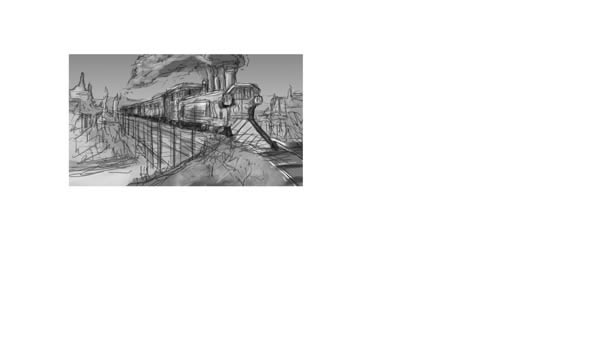
Hide the "Composition" layer and "Persp" group and create a new layer, "Sky", under the "Base" layer. Fill it with the Gradient Tool (G), with some grays (brightness of 55 and 75). The dark must be at the top, since the sky tends to have more brightness when it goes near the horizon line. Create a new layer over the "Sky" one called "Values" and, with the brush #2, draw some values! You must have in your head "light and shadow", and "aerial perspective". Don’t put any detail or any color, only do some quick and very simple shapes. Set the "Details" layer’s opacity to 50% once it’s done.
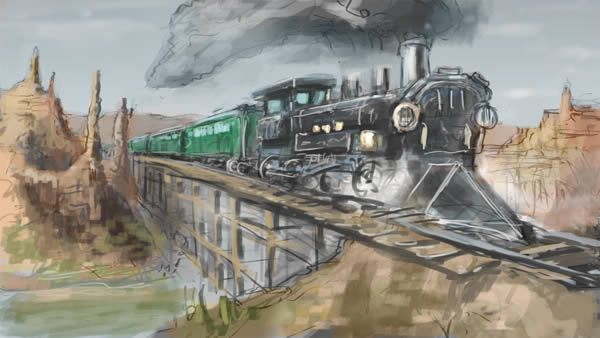
Here is the result, which is a very quick black and white sketch! I really didn’t put any details, but it still looks pretty good. Now let’s move to the next step!

Step 4: Color sketch
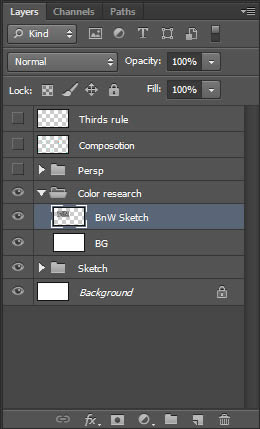
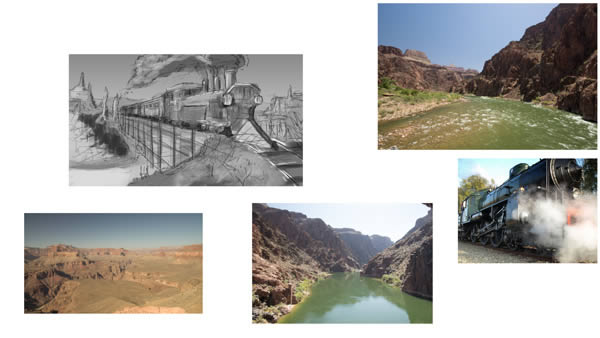
Close the “Sketch” group and create a new one, “Color research”. Create a new “BG” white layer. Select the “Sketch” group, duplicate it (Command/Ctrl + J), and merge it (Command/Ctrl + E). Rename it “BnW sketch” and place it above the “BG” layer we just created. Transform it to have some place for some references photos.
Create a new group called “Color refs”, and add some photos you’ll use as color references. Since it’s a photo realistic landscape, we can’t use some custom funky color and need to pic some samples from the nature itself. I imported the “beach”, “desert-01″, “water” and “train-01″. You can download those at the beginning of the tutorial, in the assets.
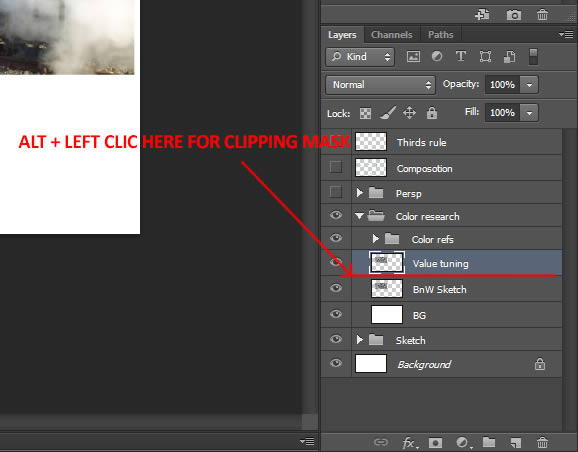
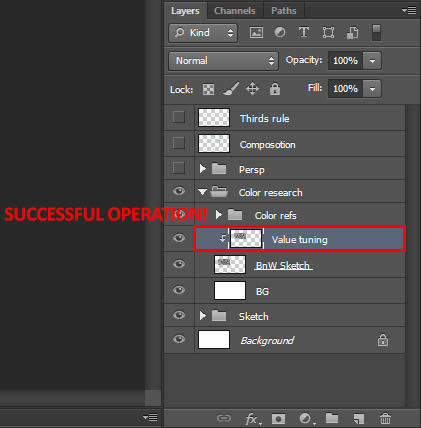
Then we’ll draw some new layers, on a "Clipping Mask". Those new Clipping Mask layers will use the transparency of the layer below. We’ll be using it a lot! Let’s create a new layer, "Value tuning", using the transparency of the "BnW Sketch" layer. Alt + Left Click between the two layer makes the one above being a Clipping Mask.
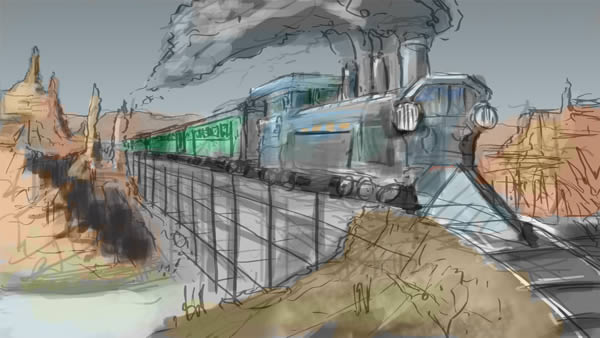
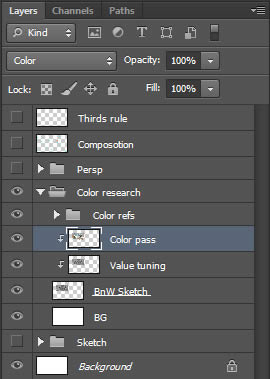
Now create another similar layer, "Color pass". Set the blending mode to Color. Basically, we’ll add the color picked from the refs on this layer, as we add the values picked and desaturated in the "Values tuning" layer.
Create another similar layer, "Refine pass 1". Add some more details over everything, some color variations and some more precise shapes as shown. As you can see, I changed a bit the perspective of the rails. The composition feels better to me like this. It’s never too late to do those small adjustments. One trick to get them, is to constantly flip the canvas horizontally (Image > Image Rotation > Flip Canvas Horizontal). I set it as a shortcut, and use it every few minutes to check the composition.
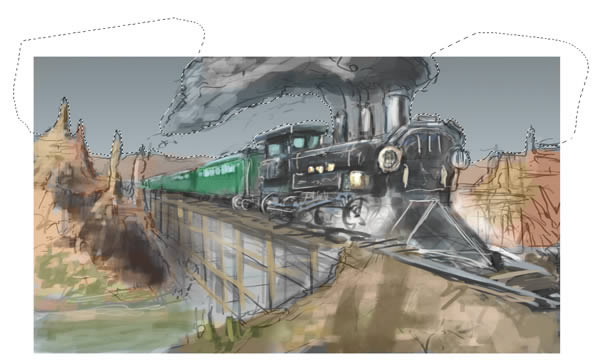
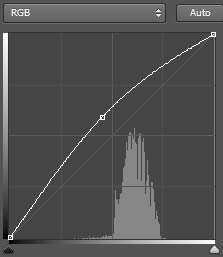
At this stage, the sky is a bit too dark. Use the Lasso Tool (L) and quickly select the sky. Then create a new Curves Adjustment Layer. Set the curve as shown below in order to bring some lights. Don’t forget to set that Adjustment Layer as a Clipping Mask, since we don’t want it to change anything else than this small sketch. If we don’t do it, it’ll change every layers below.

[tip]
Tip: Having a Selection before creating a new Ajd. Layer create an automatic layer mask. You can access to them by Alt + Left Click on them. Desactivate/reactivate them with Shift + Left Click. And, as we can for every normal layers as well, you can Command/Ctrl + Left Click to get their transparency. For standard layer, it selects only the non-transparent pixels. For the layer mask, it selects the white pixels, as it is the active part of the layer mask.
[/tip]
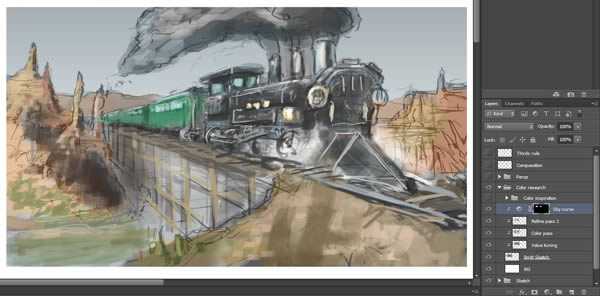
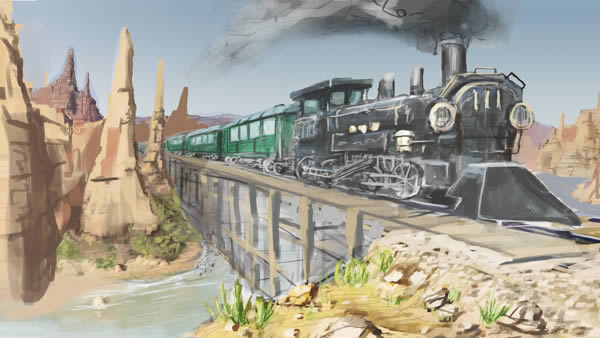
Create a new layer, “Refine pass 2″. Draw some last details, clouds, flip the canvas, try to feel what needs to be change, what is good. Keep in mind that it is still a sketch, and will anyway change because of the photos, which won’t exactly match our design.

As a final step, Command/Ctrl + J and Command/Ctrl + E (Duplicate and Merge group) the “Color research” group, rename the created layer to “Color sketch” and Transform it to match the full canvas. I did some last tweaks, because the scale, perspective and contrast wasn’t very good. Here is the final color sketch I used as a reference for the next steps. I added some pixels in the left part, because it was a bit tight over there. The new format used is 4073x2160px instead of a 3840x2160px.
